-1.png?height=120&name=CitNOWGroup_endorsed-branding_social-profile_Web1on1_square%20(3)-1.png)
Utilise the power of our Zapier integration to send leads or results directly into your CRM
![]() Zapier is a useful third-party connector tool that allows users to integrate external data and automate their workflows. Using our easy Zapier integration, you can automatically send your Web1on1 leads or conversation outcomes into Zapier and then create a workflow into your CRM system.
Zapier is a useful third-party connector tool that allows users to integrate external data and automate their workflows. Using our easy Zapier integration, you can automatically send your Web1on1 leads or conversation outcomes into Zapier and then create a workflow into your CRM system.
Follow our step-by-step instructions to set up your Zapier integration.
Pre-requisites
You must have:
- Your own Zapier account from https://zapier.com/
- A basic knowledge of how to set up Zap triggers from within Zapier.
Setting up your Zapier connection
Step 1 – Create a new Zap in Zapier
- Log into your Zapier account.
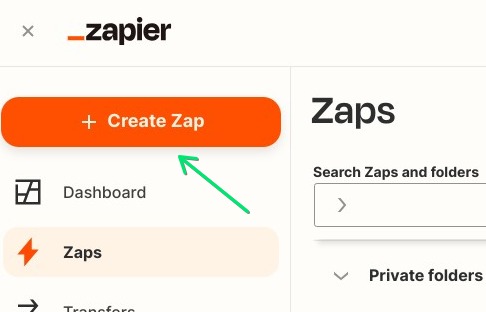
- Click the Create a Zap button
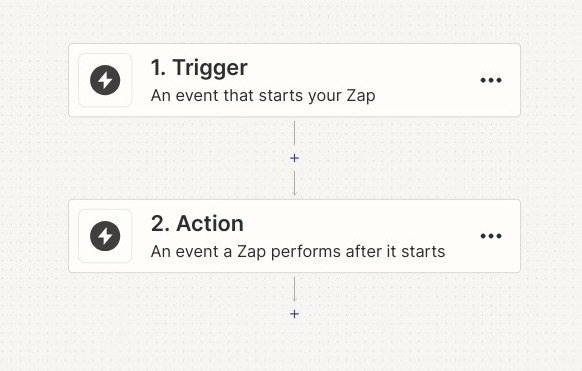
3. Click the Trigger button
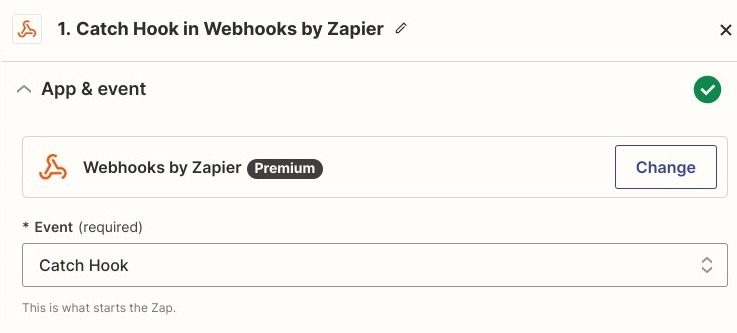
4. Select Webhooks by Zapier
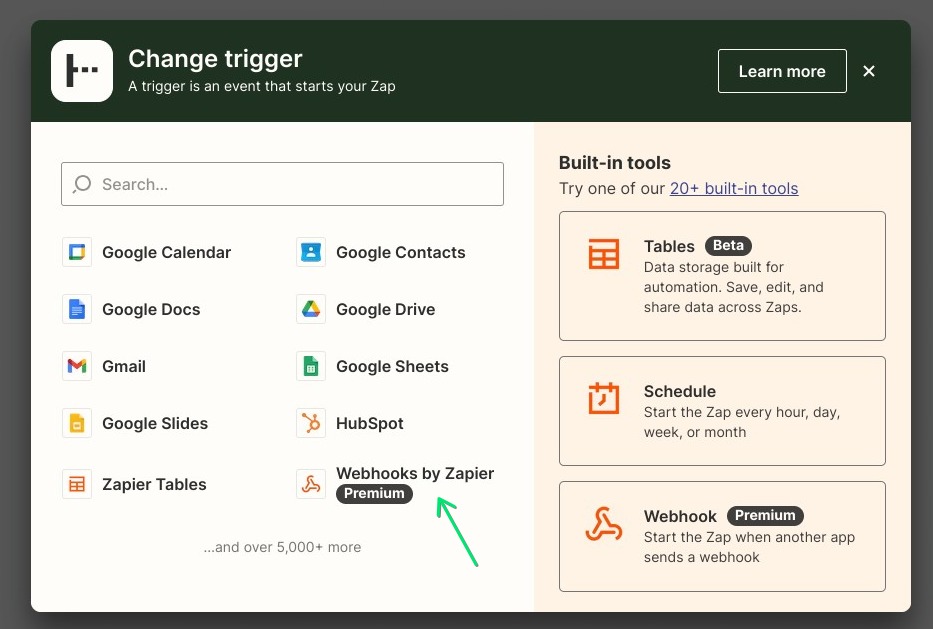 5. Under Event, choose Catch Hook
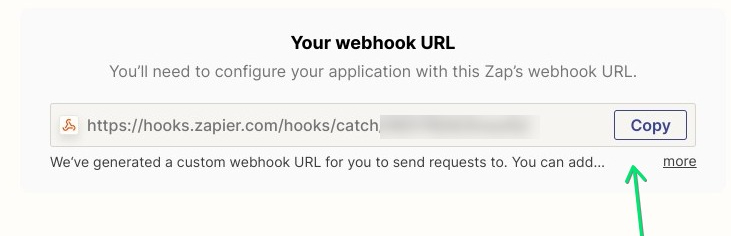
 6. Now go straight to Test, and copy the webhook URL by clicking the Copy button.
Step 2: Activate the Result Processor Webhooks by Zapier bot in the Web1on1 botstore
- Log in to the Web1on1 platform. From the left-hand navigation, go to Orgs > [your organization] > Chatbots and click on the Botstore tab.
- Use the search tool to find the Zapier bot and press the Hire button.

This will open up a new modal window.
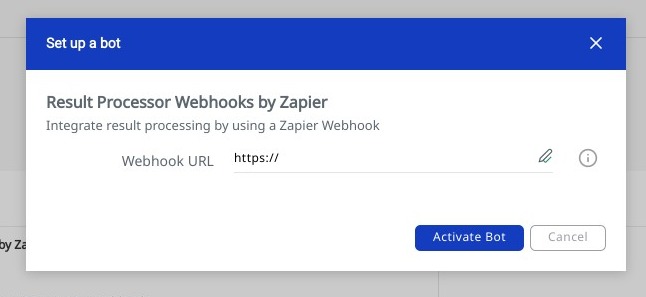
3. In the Webhook URL field, add in the Zapier webhook url you copied earlier.
4. Click Activate Bot.
That’s it! This will activate the bot and move it over to your My Bots area.
Step 3. Configure your Zapier account with lead or results data
To start creating workflows in Zapier using the results data from the Web1on1 platform, you first need to create a conversation and send through a result from a form. You can skip this step if you’re already using the platform to create leads and outcomes and live chat is set up on your website or another communication channel. The data will flow into Zapier automatically the next time a lead is taken.
If you don’t yet have live chat on your website, you can initiate a conversation inside the Web1on1 platform by navigating to the Live Chat area in the Channels section:
Navigate to Organisations > [your_organization] > Channels and choose Live Chat
Go to the agent console and pick up the conversation you just started. Then create a new form from those available and fill out the fields. Submit the form.
Further guidance - Conversations and Forms.
Step 4. Use the data to create workflows in Zapier
Go back to your Zapier set-up and click Find new records. Each new lead should create a new request line in your Zap.
You should now see your leads arrive into Zapier in a structured format. The fields shown will depend on what form you have chosen. Example fields common to most forms include givenName, familyName, email and telephone but there are many more you can use.
Example 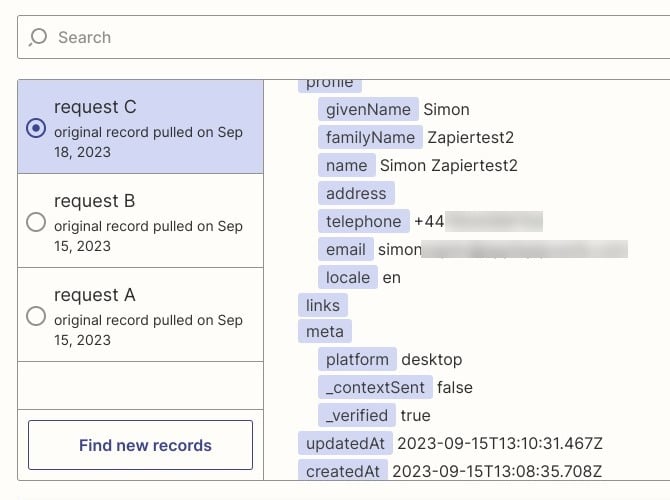
To create a workflow, you should now create an Action, an event a Zap performs after it starts. You can use this to send the lead data into your CRM or anywhere else. This is entirely up to you. Please refer to the onscreen instructions in Zapier to create an Action that suits your business needs.
That's it!
Editing your Routing rules
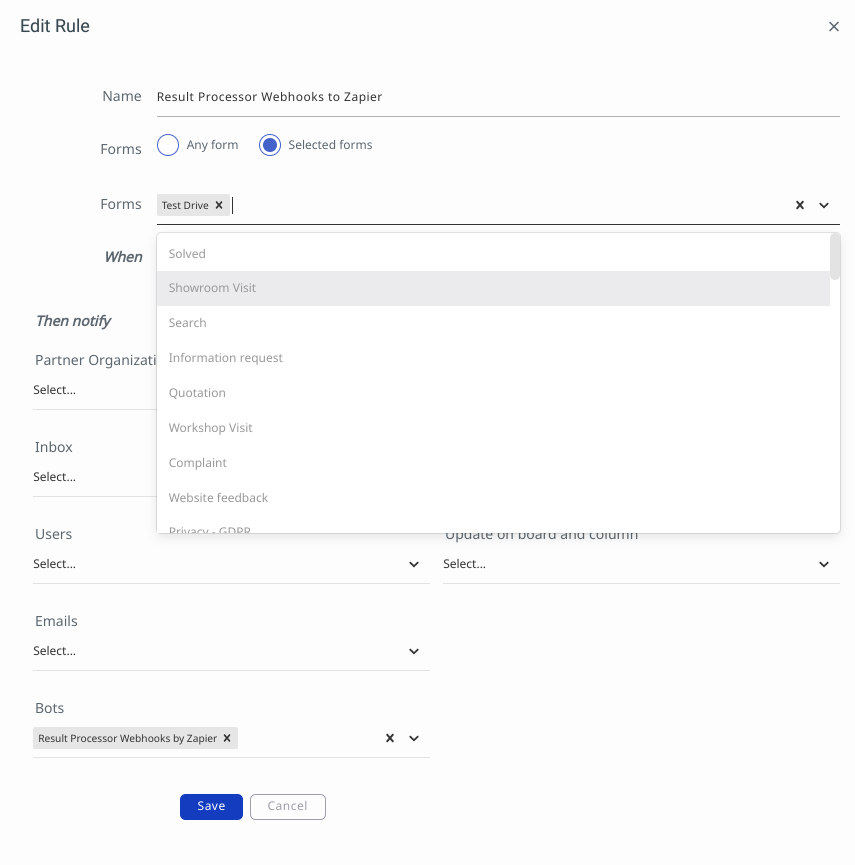
When you hired the Zapier bot in the botstore, a new routing rule was automatically set up in the Routing section of your platform application. It sends the results and leads from ALL forms to Zapier, but you can change the routing rules to only send certain leads instead, if you wish.
To do this, go to Organizations > [your_organization] > Routing and click the Results Notifications tab.
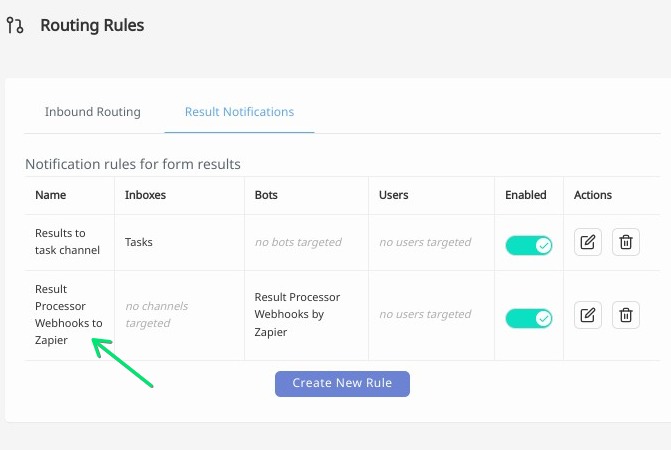
- Click on the Result Processor Webhooks by Zapier routing rule to edit
- Choose the Selected forms radio button
- Use the drop-down menu to select individual forms to send only those form results to Zapier.
- Click Save.