-1.png?height=120&name=CitNOWGroup_endorsed-branding_social-profile_Web1on1_square%20(3)-1.png)
Once hired and configured, it is time to activate your virtual colleague
Chatbots concerned: All consumer facing bots
Pre-requisite: Hire and configure at least one of the chatbots from the bot store
What does "activating a bot" mean?
Since humans and bots work simultaneously on the Web1on1 messaging platform, it's important to define when a chatbot should jump into a chat and do its magic. We describe the various options below.
1. Start a bot via a Call-to-Action (CTA) on your website.
The most common way to start a chatbot is to use a Call-to-Action button on your website.
Enabling chat from CTAs on your website requires adding a snippet of chat code behind the CTA button, so managing them is probably the responsibility of your website manager or the company who manages your website. We have a special page within the Web1on1 platform to share with your website manager that explains the code required.
How do I find that page?
- Access your Channels section from the left-hand platform navigation
- Click on Live Chat
- Click on Open test widget in a new tab
- Click on CTA Buttons
Or take a look at the video below:
Tip: You could also give your website manager access to the Web1on1 platform by adding them as a user. See the Users section
Bot ID
To link a CTA to a chatbot specific to your organisation, you will need to add the correct bot ID.
For example, in the help page above, the Book a Test Drive bot has the following example code containing a dummy bot id in bold:
<button data-web1on1-bot="6081529153542604f56acb05">Book a test drive</button>
For it to work on your website, you will need to replace the long number id with the one specific to your bot.
Each bot has its own ID, and can be found by clicking on the bot itself in the bot store and viewing the details page.
Here's an example below, but of course your bot ID will be different for each bot.
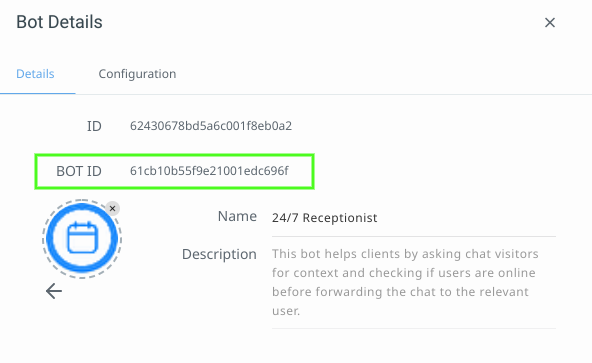
See the video below to find your bot ID.
2. Configure routing to activate a bot
For bots that work after a visitor uses the live chat widget to initiate a chat, it's necessary to configure a routing rule to make sure the bot is initiated at the right time. These type of bots are activated when a real-live person is unable to accept a chat, such as the 24/7 Receptionist Assistant that steps in to handle out-of-hours chats.
To configure the routing:
- Go to your Routing section from the left-hand platform navigation
- Here, you can create one or more new rules.
Example rule
In the screenshot below, you will see a routing rule that activates the 24/7 Receptionist to jump in outside office hours from Monday-Friday.
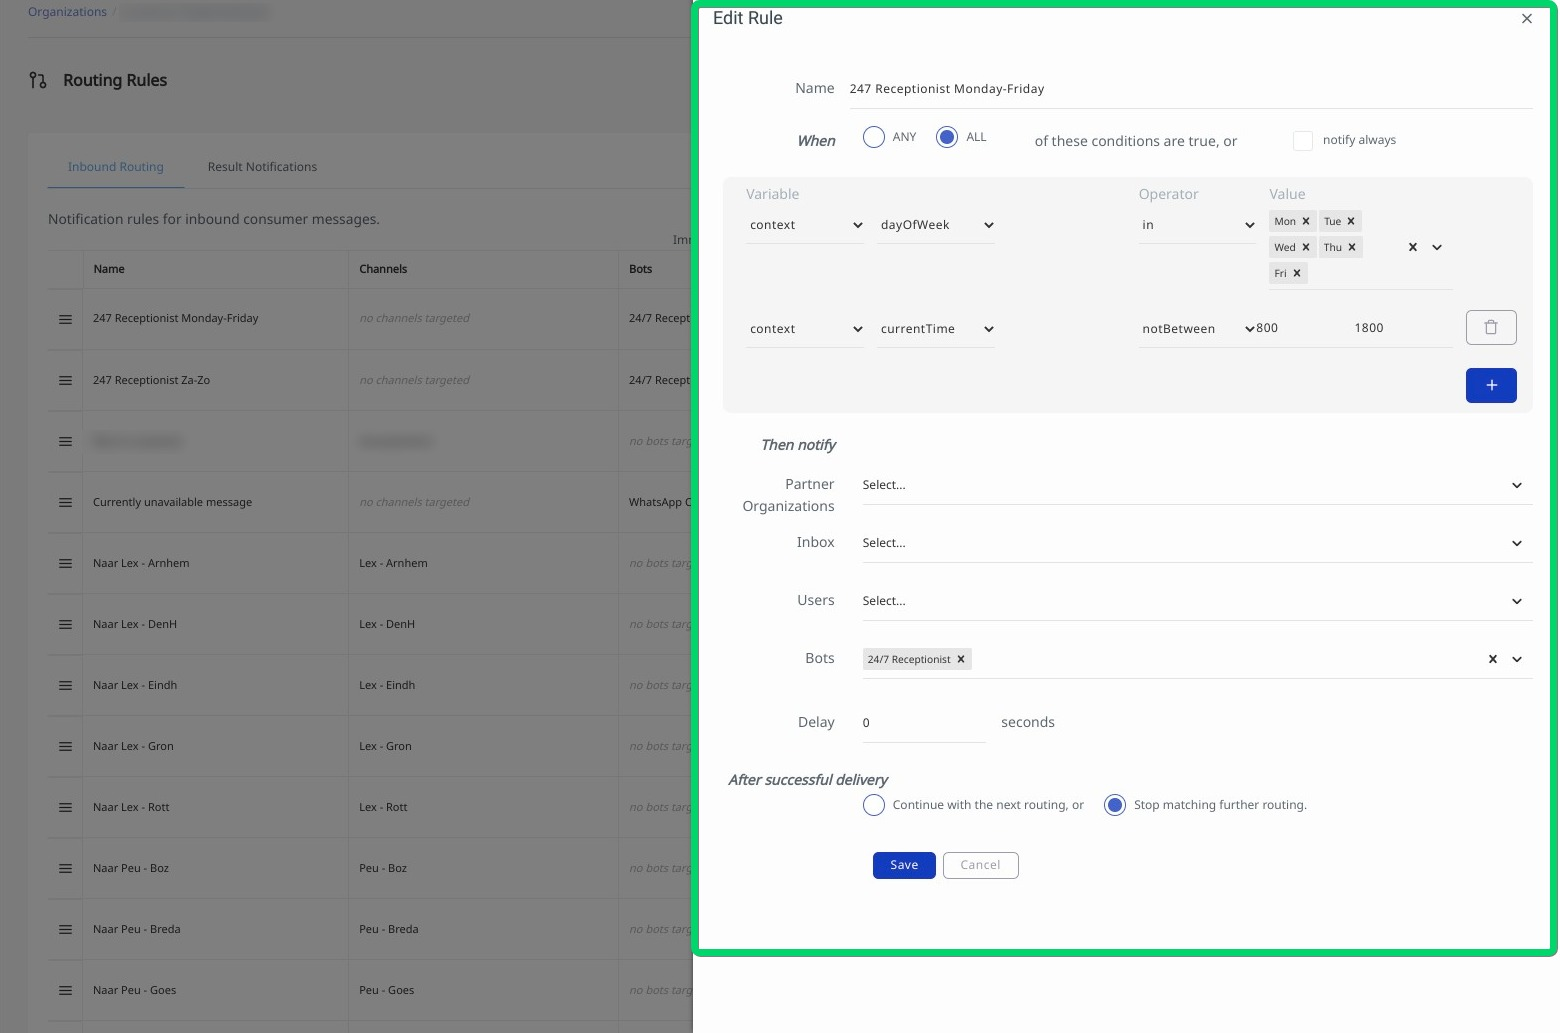
Find out more information about how to configure routing rules.
Get help: There are many ways to activate chatbots using routing rules, so if you have any questions please contact our Support Team via our Help Center Chatbot
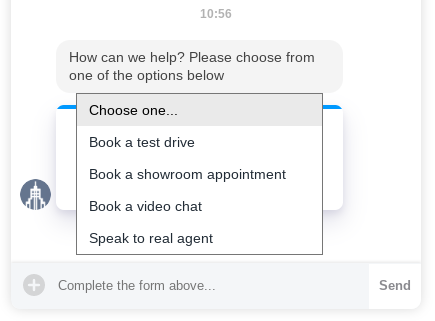
3. Activate a bot as part of a hybrid chat conversation
Chatbots can also be started within the live chat widget at the start of a conversation using our hybrid chat feature, where real humans and bots are available to help, depending on the visitor's requirements. See the screenshot below, where the consumer can choose between different scenarios and either a bot or a human will help. For each scenario, you can configure whether a chatbot or a real chat operator from either your team or Web1on1 is best suited to respond to the visitor's request.
Get help: If you would like to activate the Hybrid Chat feature, please contact our Support Team via our Help Center Chatbot