-1.png?height=120&name=CitNOWGroup_endorsed-branding_social-profile_Web1on1_square%20(3)-1.png)
Use WhatsApp to communicate with your aftersales customers about the work on their vehicle before, during and after it’s in the workshop.
What does the aftersales board do?
It’s a dedicated view inside the Web1on1 messaging platform that allows service teams to communicate with customers even before a vehicle reaches the workshop. Once in the workshop, service advisors can easily keep customers fully up–to-date on the progress of their repair or service via WhatsApp without the need for anyone to pick up the phone.
Here's what the dashboard looks like:
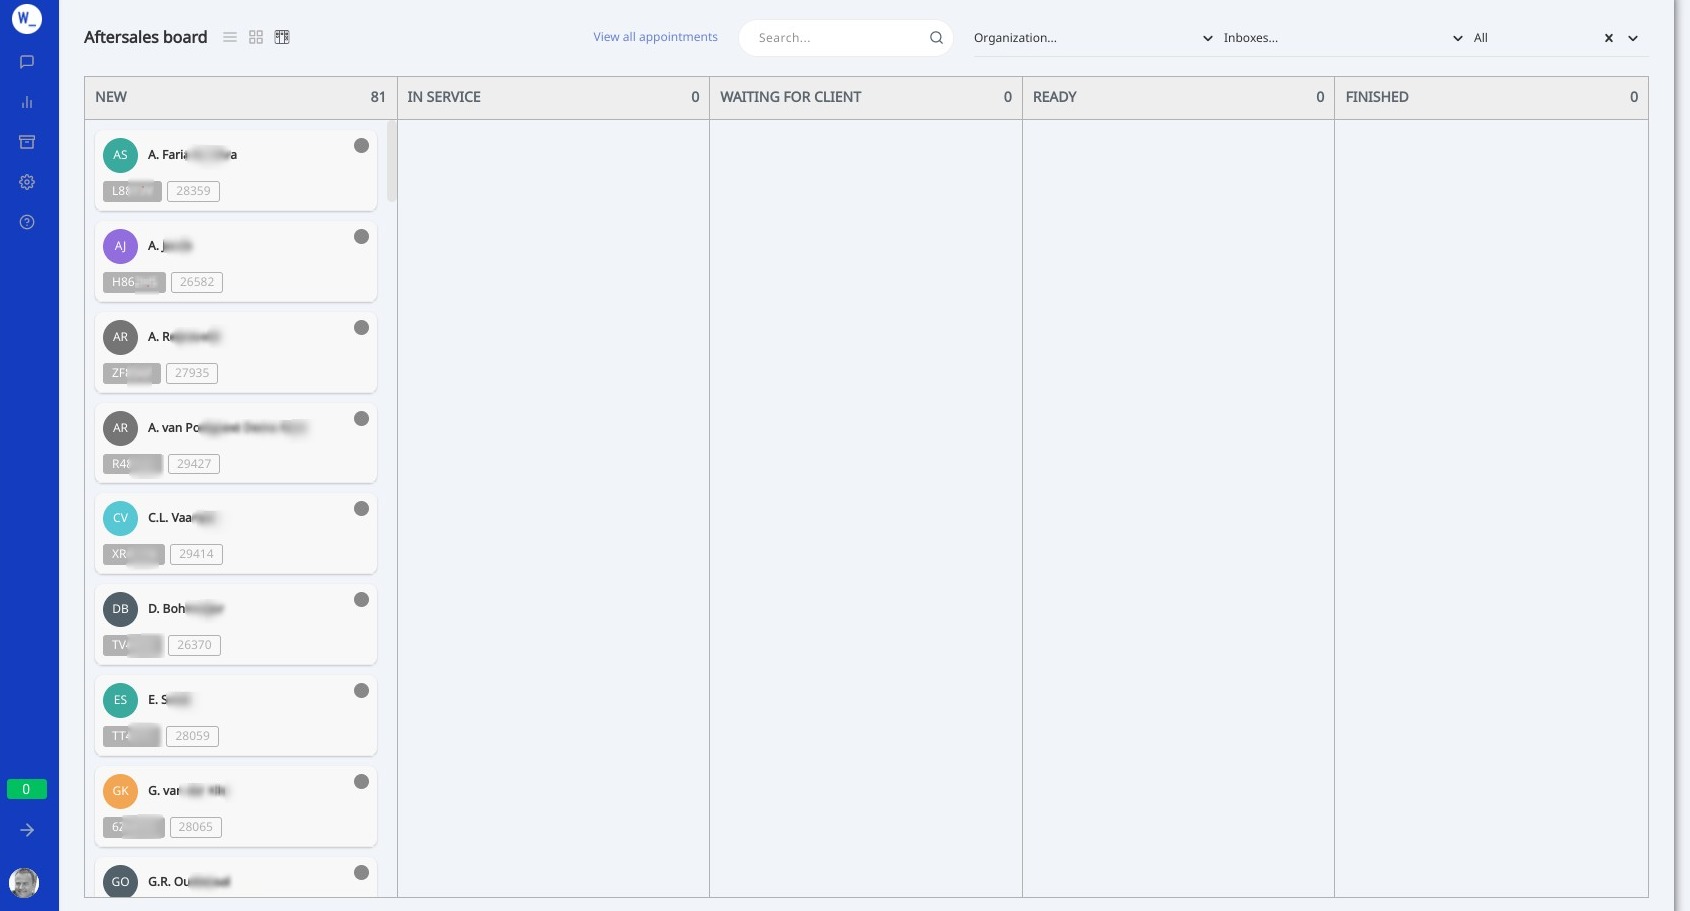
How does it work?
The dashboard makes communicating with your aftersales customers easy.
The system automatically sends an appointment reminder to the customer the day prior to their appointment, opening up a WhatsApp conversation that can be maintained as long as required. That means you and your customers can stay in direct contact with each other before the vehicle arrives, during the scheduled work, and even after the vehicle has been collected.
It works like this:
- All new aftersales appointments entered into your workshop planning system are automatically pulled into Web1on1 every hour via API or FTP.
- Only the current day’s appointments are displayed on our kanban-style board in time order from earliest to latest, along with any appointments that need to be held over to the following day or later.
- Service advisers and engineers can view all of the day’s scheduled appointments and manage the different stages of repair or servicing while the vehicle is in the workshop.
- At the same time, they can easily communicate with each customer by clicking on an appointment card to open up the messaging channel to send a WhatsApp message.
Prerequisites
- The aftersale board currently works with three workshop planning systems - PlanIT, 1i Automotive and ISPA Next (BMW) - as well as an option to transfer appointment data via FTP. Please contact us if you have a different system.
- You will need to have a WhatsApp account configured for your Web1on1 organization.
- You will need to have configured the WhatsApp Service Appointment Reminder bot.
- You will need to have configured your WhatsApp templates in the Content Library. Read more about setting up your templates.
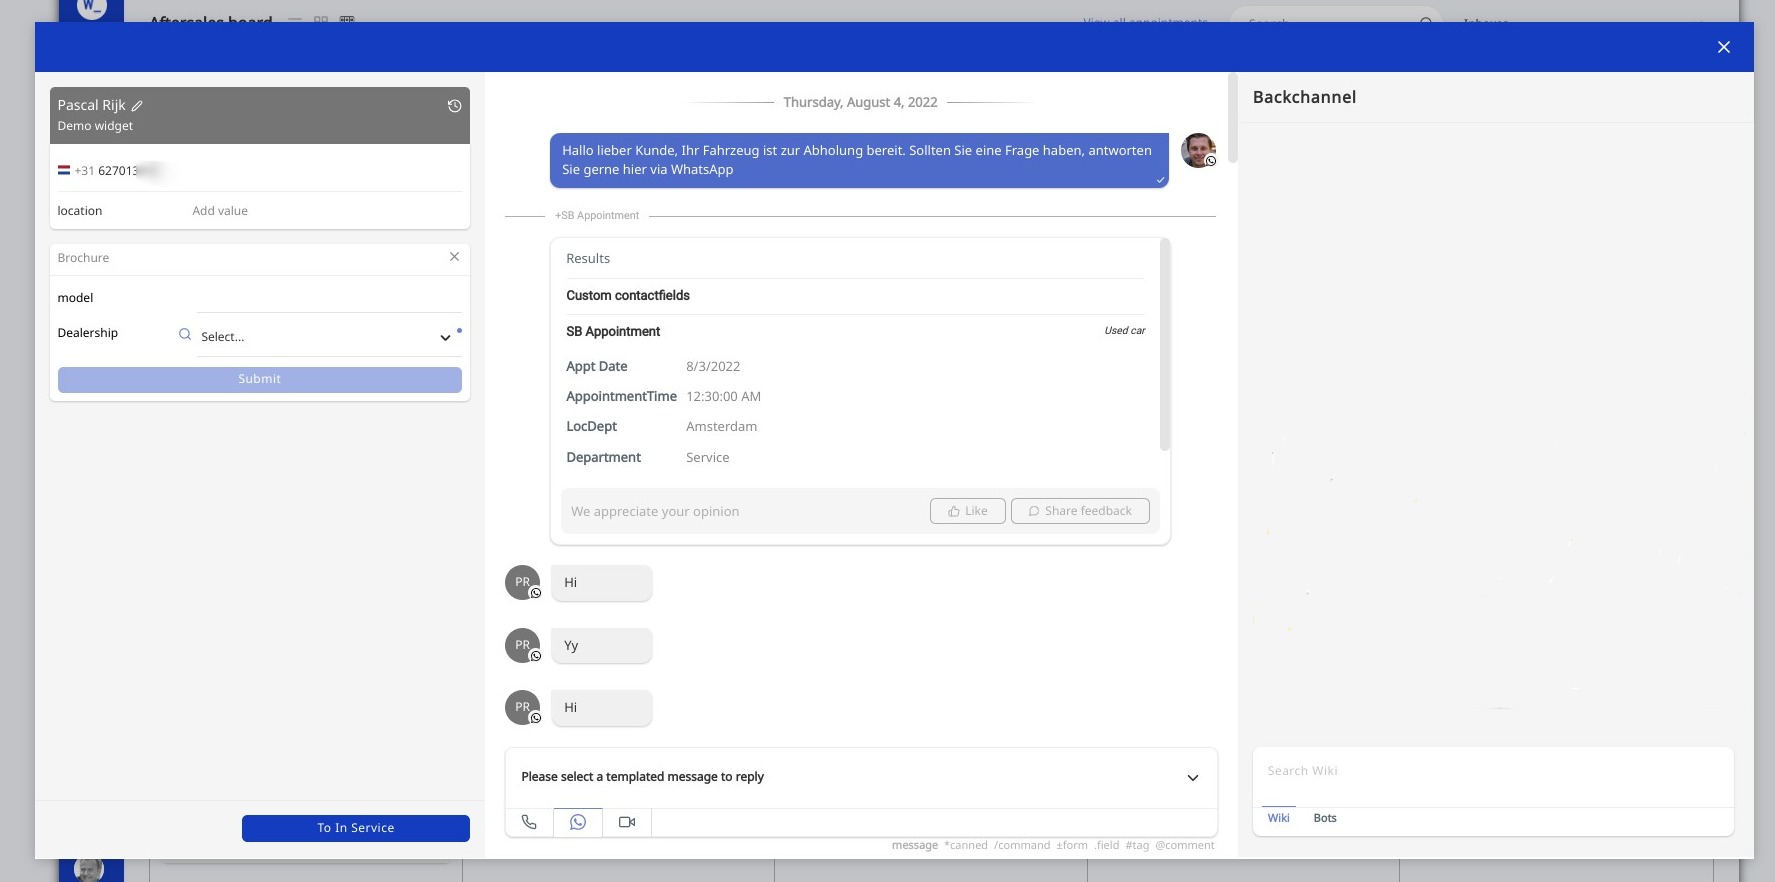
How do I send and receive WhatsApp messages to my customers?
The aftersales dashboard is linked to the messaging channel to allow service supervisors to easily send and receive WA messages to their customers by expanding an appointment card. You just need to click on the appointment to zoom into the full conversation. The new window will display all previous messages to and from the customer, along with all their contact details and other information about them. To return to the aftersales board, just close down the conversation window using the x in the corner of the screen.
Example view:
Remember
- WhatsApp requires you to initiate a conversation via a WhatsApp template, and this is done automatically by the system the day before each appointment. You can send more if the visitor doesn’t immediately respond.
- Once a template is sent, a 24-hour window opens in which you and your customer can send and receive unlimited messages. Once 24 hours have passed, you will need to either respond to the customer’s message or send a new templated message to start a new 24-hour window. Read more about WhatsApp Business pricing.
Inside the 24-hour window, you can choose to either:
- Write and send your own text message in the message box or
- Use the chevron on the right to choose from your pre-configured WhatsApp templates.
.png?width=624&height=111&name=3aftersales_dashboard%20(1).png)
Outside the 24-hour window, you will need to send a new templated message by clicking on the chevron and choosing a pre-configured template from the drop-down menu.

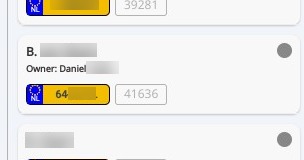
What information can I see in the dashboard?
You'll be able to see the customer's name, license plate and work order in the dashboard view along with the service supervisor's name (owner) if it's been added to the contact's details in the conversation stream.
Depending on the data captured by your workshop planning system, you'll be able to view more details about the customer in the contact form in the conversation itself, such as the phone number, make and model type of the vehicle and the work being done, such as service, aircon refresh, or tyre change.
How do I use the five columns?
There are five columns in the aftersales board and you can drag and drop any appointment into and out of any one of them according to the progress of the repair or service. This is for your own convenience to keep track of the work. You can also move the appointment to any of the columns from inside the conversation with the customer itself.
The default views are:
| New | All new appointments will appear here at the start of the day. |
| In Service | Drag an appointment into this column when the car has been received |
| Waiting for Client | A holding area while waiting for customers to made a decision about any extra work required on their vehicle |
| Ready | Move appointments here when the work is complete and you have sent a message to the owner to say their vehicle is ready to collect. |
| FINISHED | Move here when the job is done and the vehicle has been picked up. Note that appointments will not be removed from the dashboard until they are moved into the Finished column. |
Note: Unlike the list view of conversations, the dashboard is a collaborative way of organizing your workshop activities which means that multiple people can use it at a time. Remember that moving an appointment from one column to another will change it for everyone.
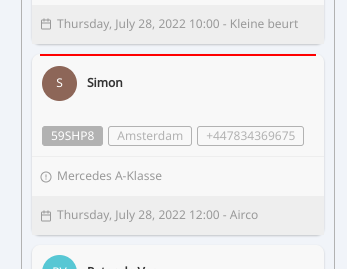
How will I know when a customer replies to a message?
As soon as a customer replies to a WhatsApp message, a red line will appear above their appointment card to notify you. It will disappear the moment you visit the conversation by clicking on the card.
You can also filter on unread messages by selecting Waiting conversations in the drop-down filter at the top right of the screen.
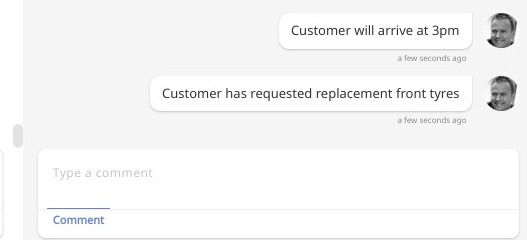
Leave a comment in the back channel
The system allows you to easily leave a comment relating to the customer next to the message stream, so you can easily keep track of any developments with their aftersales care.
To leave a comment, zoom into the conversation by clicking the appointment card. Type your comment in the space provided underneath the back channel and press Enter. The comment will appear in the back channel.
Comment area:
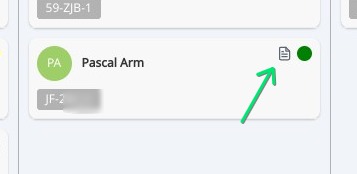
A note icon will appear in the appointment card to denote that a comment has been left.
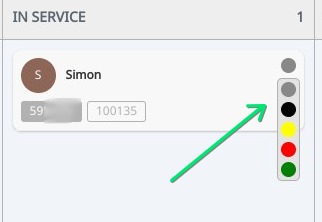
You can also use the drop-down color picker menu to assign a color to each appointment so you can highlight or group together different types of appointment.
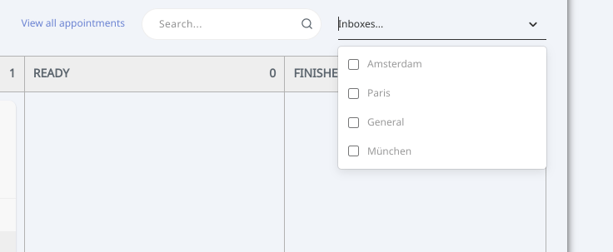
Configuring the filter to show only the appointments you need
If your company is a brand with multiple dealerships, you can configure the dashboard to show appointments relating only to your workshop inboxes via the Inboxes filter at the top of the screen.
Your filtered view will remain the default view each time you log into the platform.
View all your past and upcoming appointments by date range
You can see all of your appointments in a list view by clicking on the View all appointments link at the top of the screen in the dashboard view. You'll be taken to a page where you can search according to a date range.
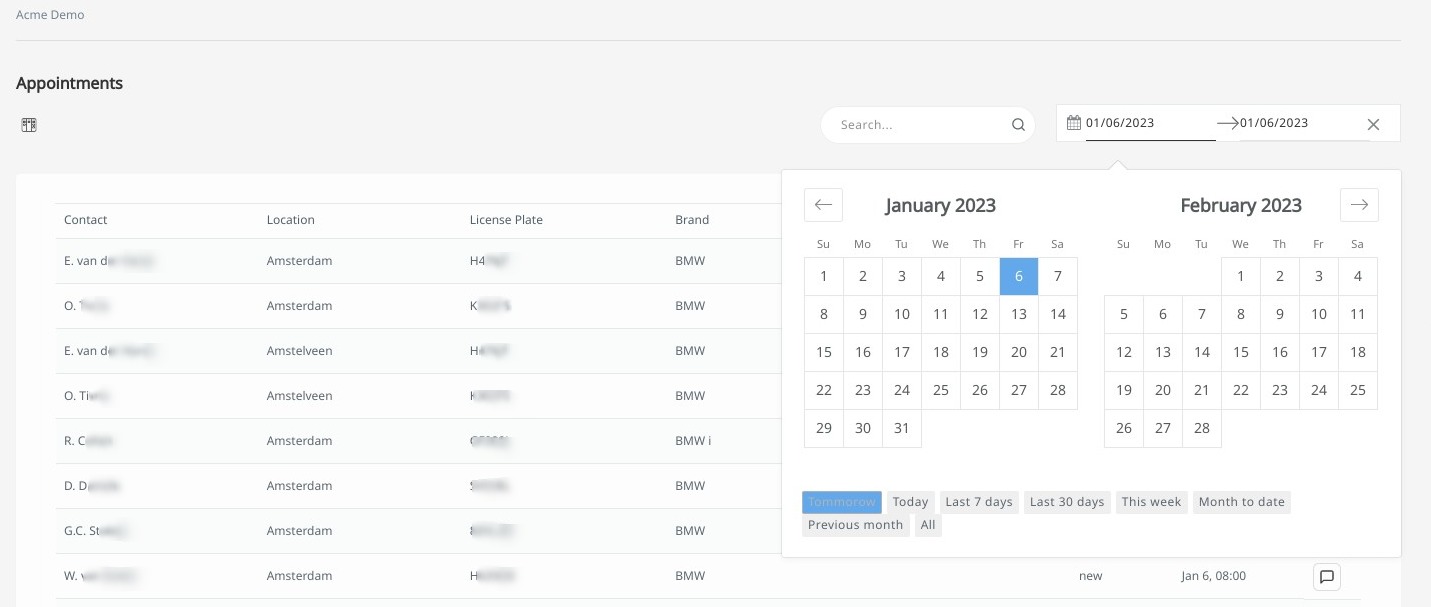
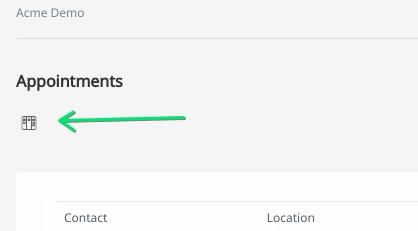
You can then move back to the dashboard view by clicking on the icon in the left corner.
Adding an appointment manually
Although your aftersales appointments are automatically pulled into the dashboard from your workshop planning system, sometimes you may wish to add an appointment manually, such as when a vehicle arrives for an unscheduled damage repair.
Here's how to add an appointment manually.
First, let's see if the customer is already a contact in the messaging platform.
1. From the Conversations page, type in the name, email address or phone number into the search function at the top of the screen. If the contact is found, click on the contact's name to open the previous conversation and double check that you have the correct customer. Then move on to step 3.
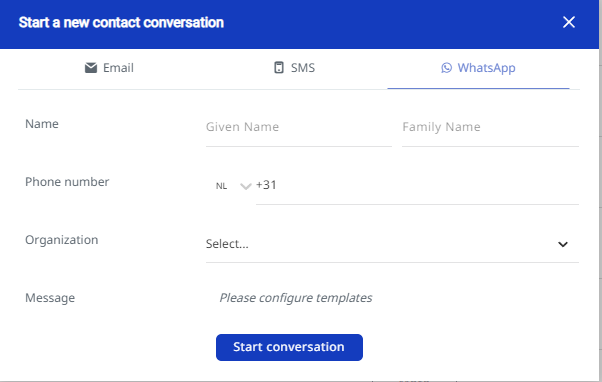
If no contact is found, you will need to initiate a new conversation. To do this, click on the + symbol to the right of the search function:

2. Next, select the WhatsApp option in the pop-out modal screen and type in the name and contact details of your customer. Press the Start conversation button to create the contact record.
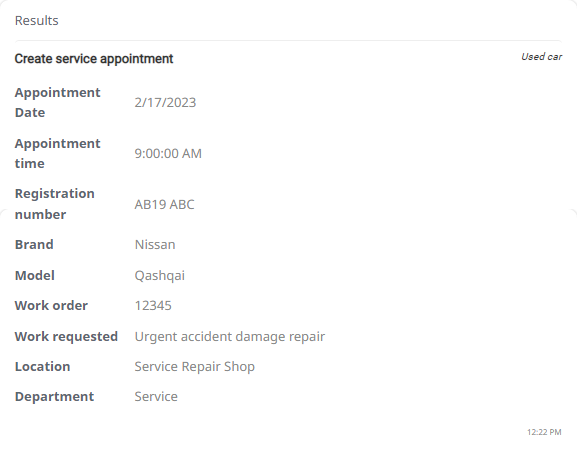
3. From the message stream, click on the form icon and locate and select the Manual Appointment form.

4. Fill out the fields in the form and click the Submit button.
Note - The Appointment Date field is the only required field needed to generate a dashboard appointment card.
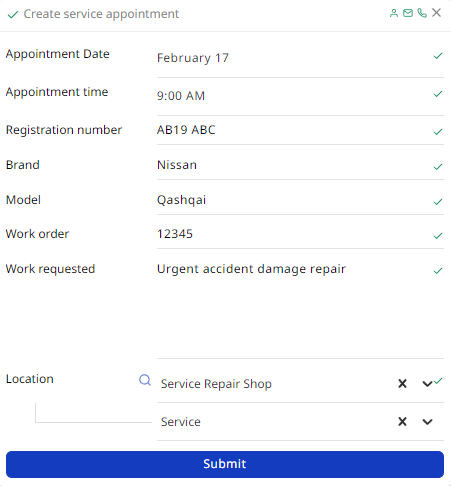
Once submitted, the form will appear in the conversation message stream:
5. Go back to the Aftersales Dashboard to view the appointment card.